


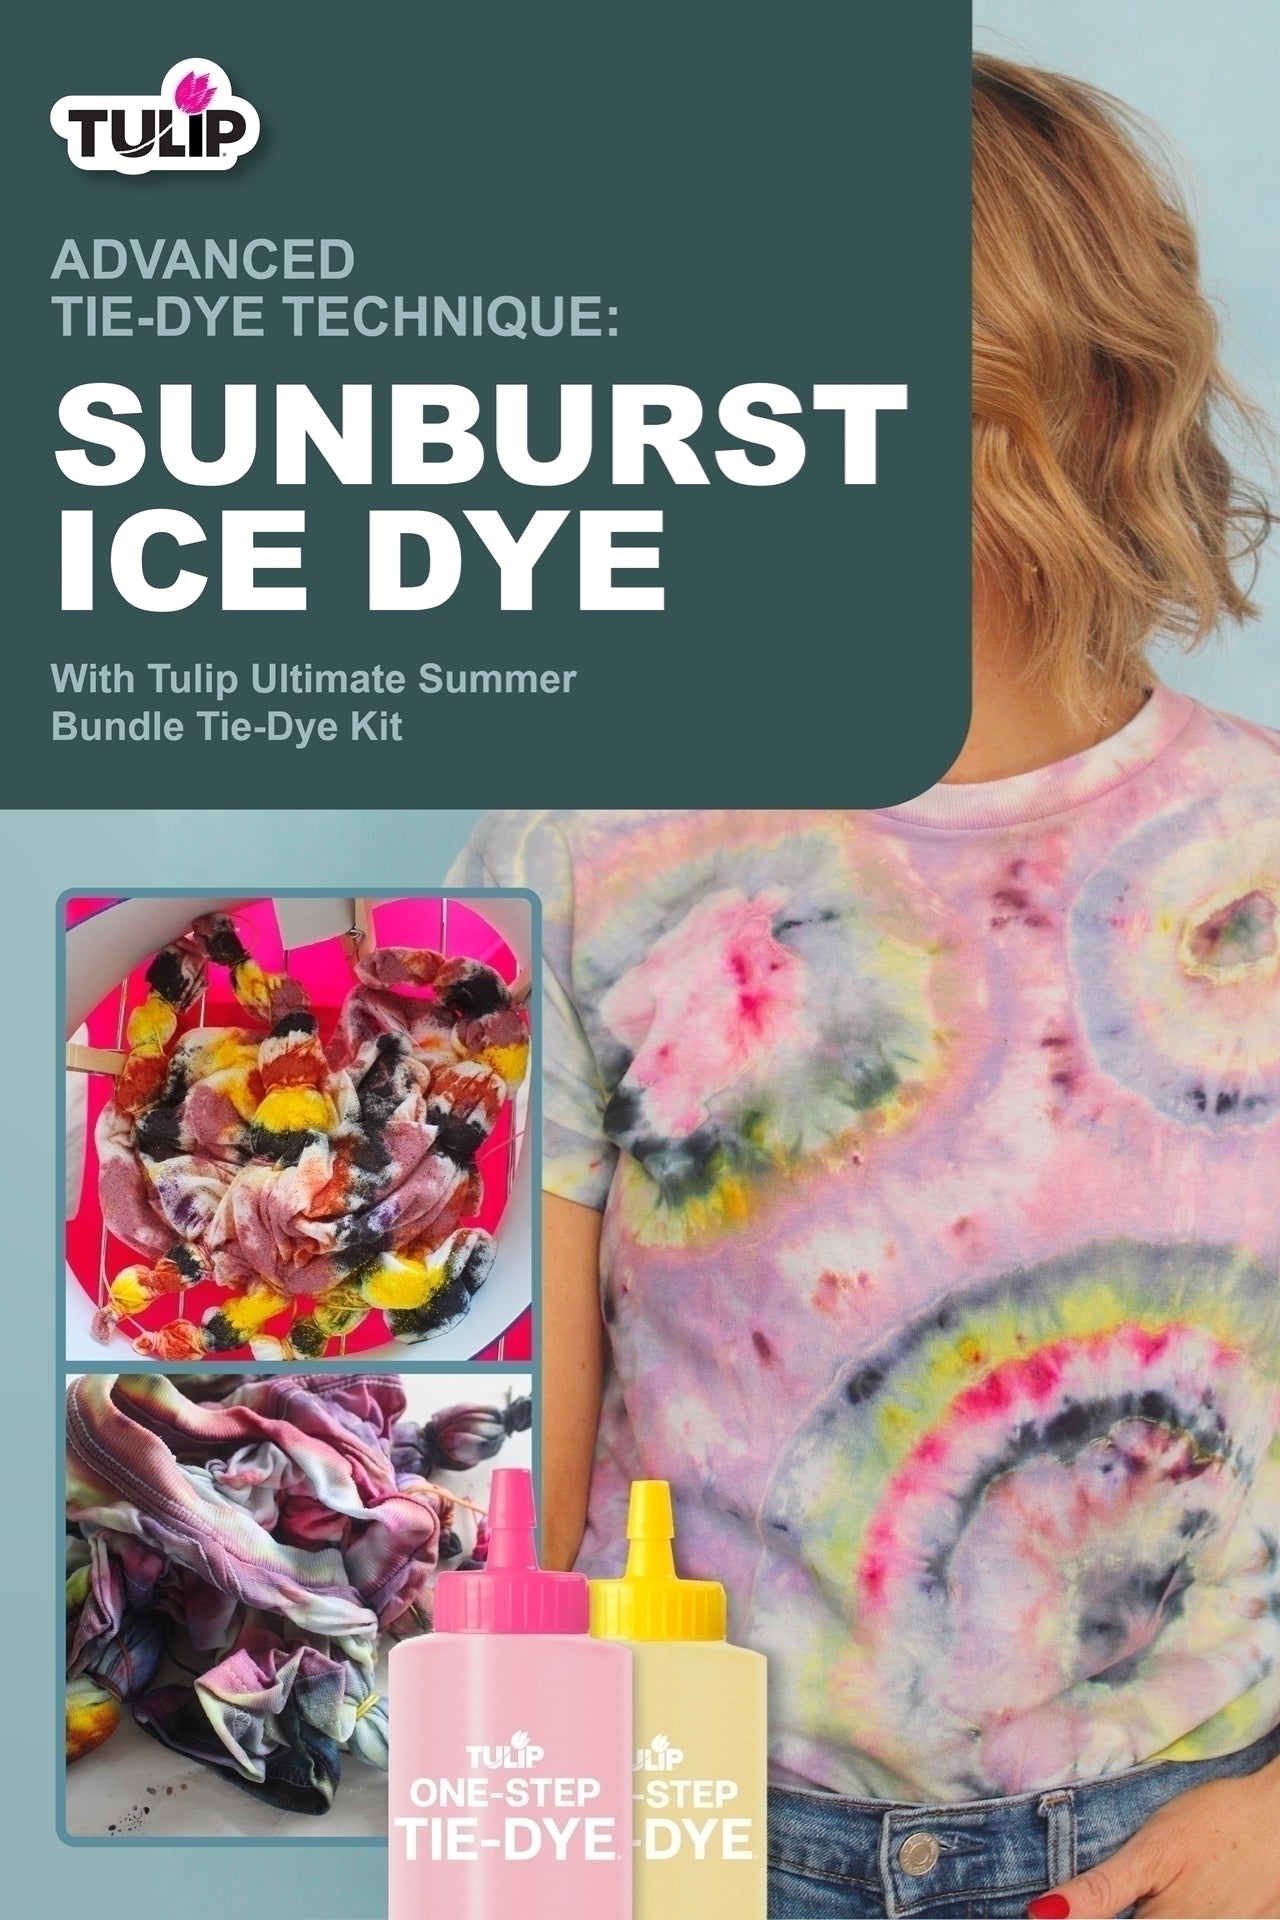
Advanced Tie-Dye Technique: Sunburst Ice Dye

One of the best things about tie dye is that it’s fun for all ages and experience levels! If you’re interested in a more advanced tie-dye technique, we’ve got you covered! Check out this advanced tie-dye tutorial from The Pretty Life Girls and learn how to tie dye using the sunburst ice dye technique. Tulip’s Ultimate Summer Bundle Tie-Dye Kit is perfect for this project— it’s got tons of vibrant colors so that you can tie dye like a pro!
What you need:
Tulip Ultimate Summer Bundle Tie-Dye Kit
100% cotton T-shirt
Wire rack + tray
Rubber bands or twine
Ice
Scissors
Sealable plastic bag (optional)
Scrap fabric (optional)
Clothespins (optional)

Step 1 Prewash tee, pinch and pull fabric to create sunburst
Before you get started on this advanced tie-dye technique, cover your work area with the included protective surface cover and prewash your shirt to remove sizing. Lay your damp shirt flat, then pinch fabric and pull upward few inches to create a sunburst.

Step 2 Bind to create multiple sunbursts
Tightly wrap a rubber band or twine 1 to 2 inches below tip of the fabric, then continue binding with desired amount of rubber bands. Repeat for desired number of sunbursts throughout the shirt. For this advanced tie-dye technique, Pretty Life Girls made 6 sunbursts with 3 to 4 sections each.

Step 3 Place bound fabric on grate and place ice guard around fabric
Once you’ve finished binding your fabric, place it on top of a wire rack over a baking tray to catch excess dye. Pretty Life Girls also created a makeshift guard out of scrap fabric and clothespins to contain the ice.

Step 4 Sprinkle the fabric with dye powder
This advanced tie-dye technique uses the ice dye method, so there’s no need to mix the dyes with water. Sprinkle dye powder directly from the bottles onto the fabric, making each banded section its own color.

Step 5 Cover project with ice and let melt
Cover your project in ice and allow the ice to melt completely. As the ice melts, the colors will transfer onto your T-shirt with beautiful watercolor effects. If you see unsaturated dye powder on your T-shirt after the ice starts melting, just add more ice and allow it to melt again.
Depending on where you live and the weather temperature, it could take a while for the ice to melt or not much time at all. If the ice melts quickly, place your project into a sealable bag and allow the dye to set for 6 to 8 hours. If it takes about this long for the ice to melt, skip the bag and move on to the next tie-dye step!

Step 6 Use scissors to cut rubber bands or twine
Once the ice has melted, use scissors to carefully cut and remove any rubber bands or twine.
