


DIY Tie Dye With Fabric Paint

Just because summer has come to a close doesn’t mean that you have to pack up all of the fun summer colors. Tie-dye clothing is a great way to carry sunny summer vibes with you into autumn in a stylish (and thrifty) way! Holly from Club Crafted shows you how to turn any of your favorite shirts into a DIY tie-dye masterpiece for an easy way to keep your fall full of fun, bright looks. The best part is that the only art supplies you’ll need are your favorite Tulip Soft Fabric Paint colors!
What you need:
Tulip Soft Fabric Paints - 4 to 5 colors of choice
White shirt (cotton, pre-washed recommended)
Squeeze bottles
Water
Rubber bands
Plastic/rubber gloves


First, you’ll need to get your Soft Paint colors mixed with water and ready to be used. (This technique requires you to water down the paints a bit.) Squeeze about 1-2 tablespoons of paint into an empty squeeze bottle.

Fill the remainder of squeeze bottle with water and close the lid tightly and shake away! It’s important that the solution is mixed thoroughly for color application.

Tip: you can test the diluted paint on a scrap fabric swatch to make sure it's properly mixed, or just do a visual check if your bottle is clear.

Now it’s time to prep your shirt. This is where you can get a bit creative. The way that you lay out your white shirt will determine how your tie-dye pattern turns out. You can vertically pleat the shirt and fold in half as done here, or experiment with other tie-dye techniques.

Now you’re almost ready to dye your shirt! Once rubber bands have been tightly placed on the shirt, wet the fabric and then ring it out to remove excess water. The shirt should just be damp. Don’t forget to put on your rubber gloves before dyeing the fabric and cover your surface with plastic to protect it from stains.
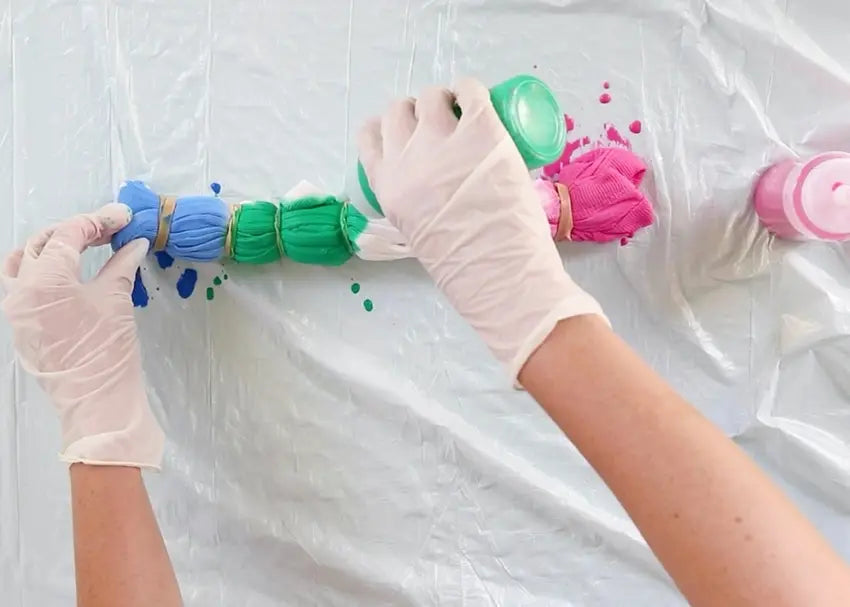
Finally, you have the chance to get creative. Take your diluted fabric paints and go crazy! Squeeze your mixed fabric paints on the shirt where you wish to have color. Once the shirt has been completely colored, remove the rubber bands. Technically, your shirt is done once it’s completely dry!

However, if you would like to achieve the above watercolor look, rinse lightly (colors will run) and allow your DIY tie dye shirt to dry completely. For more white sections and brighter colors, allow to dry completely and DO NOT rinse.

And that’s just it! After less than 10 steps, you’re ready to take on the new season with fun rainbow colored vibes.