


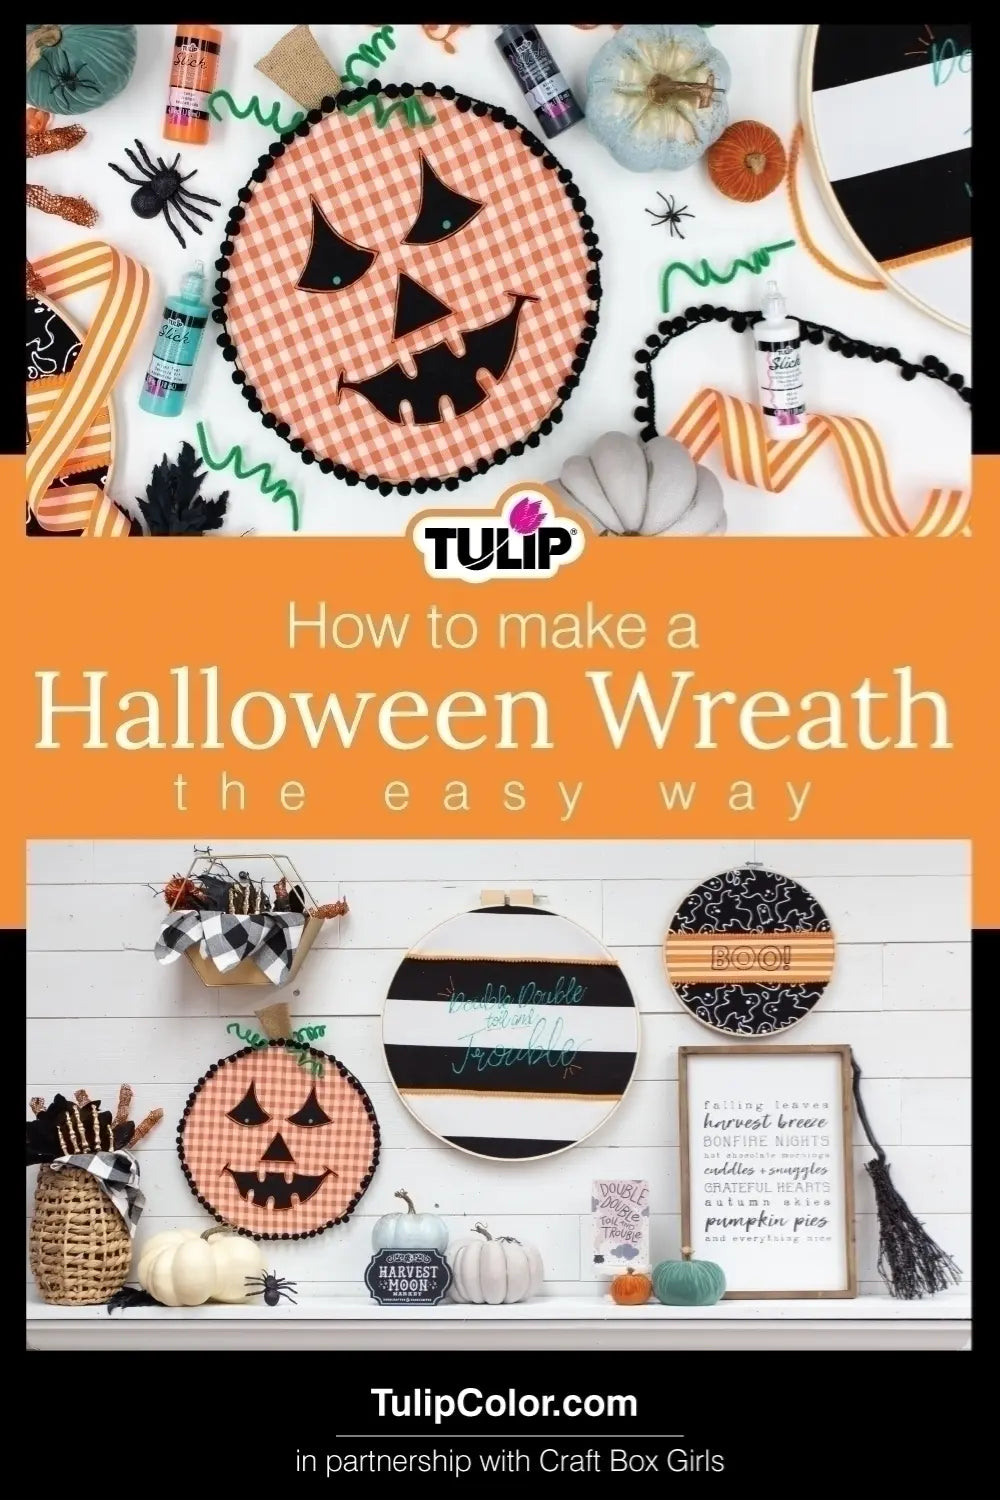
How to Make a Halloween Wreath the Easy Way
Celebrate Halloween this year with spooktacular décor that’ll have your family screaming with delight! Craft Box Girls show you how to make a Halloween wreath the easy way with colorful fabrics, embroidery hoops and Tulip Dimensional Fabric Paints. Get ready to have the most boo-tiful decorations on the block!
What you need:
- Tulip Dimensional Fabric Paints in desired colors
- Embroidery hoops
- Different fabrics and trims in Halloween colors
- Pencil or chalk
- Scissors
- Chenille stems
- Patterns (download from this post)

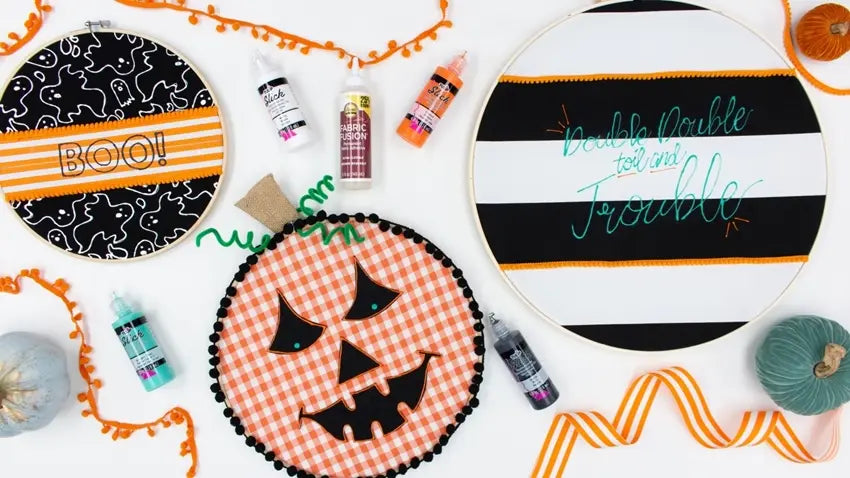
Craft Box Girls will give you three different ideas on how to make a Halloween wreath using fabrics, embroidery hoops and Dimensional Paints. For this first quote art wreath, measure and cut the fabric so it’s slightly larger than the embroidery hoop.

Glue trim onto the fabric. Craft Box Girls chose striped fabric for this wreath, and glued the trim along the striped lines.

Secure the fabric between the top and bottom rings of the embroidery hoop, pulling the fabric taught as you secure it. Trim excess fabric from around the edges. Glue any fabric still remaining to the underside of the hoop.

To transfer the “Double Double Toil and Trouble” pattern onto the fabric, first flip it over and use a pencil to color over the back side of the pattern.

Once you’ve covered the back side of the pattern, flip it back over and center it on your fabric. Use your pencil to trace over the letters, applying enough pressure to lightly transfer the wording onto the fabric.

Trace over the quote art on the fabric with your desired color of Tulip Dimensional Paint. Add any additional accent designs if desired, then let dry completely.

For the BOO wreath, repeat the process of cutting your main fabric slightly larger than the embroidery hoop.

Cut two pieces of ribbon that extend past the width of the embroidery hoop. Glue across the center of your fabric, then secure between the top and bottom hoops, making sure the fabric is taught. Cut off excess fabric.

Print out the BOO pattern and flip it over so the back side is up. Use a pencil or chalk to color over the back side.

Flip the BOO pattern back over and center it over the ribbon. Trace over the lettering, pressing firm enough to transfer the wording onto the ribbon.

Use your chosen colors of Dimensional Paint to trace over BOO and the fabric designs as desired. Let dry completely.
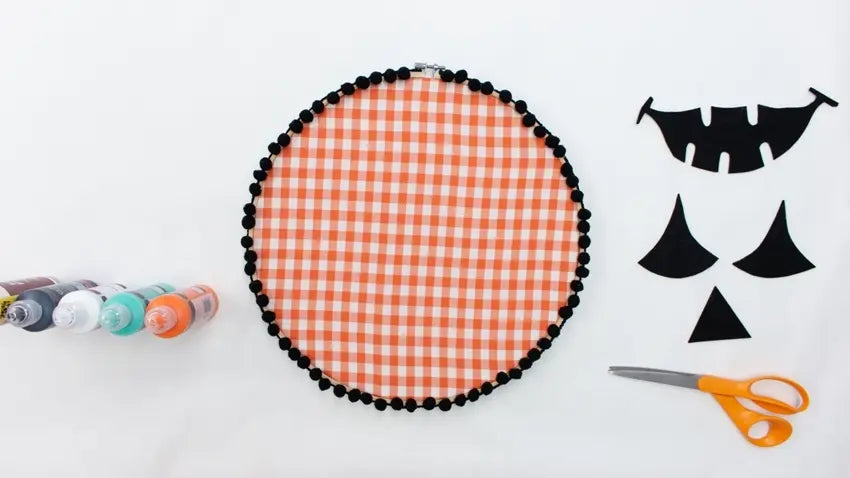
For the jack-o-lantern wreath, cut and secure your main fabric as noted in the steps above. Then glue trim around the circumference and let dry.

Cut desired jack-o-lantern face shape from black felt or fabric, and glue in place centered on the wreath.

Trace around facial features with Dimensional Paint and add eye accents as desired.

Cut out a stem from felt, and coil chenille stems around your pencil to create curled vines. Glue everything in place at the top of the wreath, then let dry completely.

Now that you know how to make a Halloween wreath in the easiest way, will you make just one? All three? Have fun getting festive for Halloween, and don’t forget to tag us on social @tulipcolorcrafts and let us know how you’re crafting with Tulip for Halloween.