


Tie-Dye Cross T-shirt
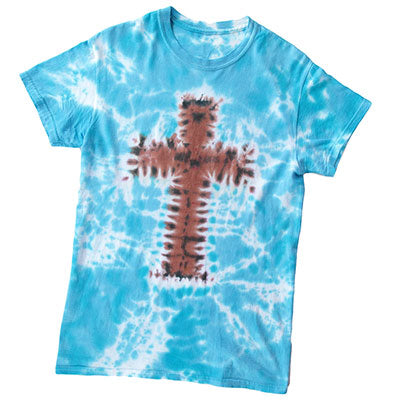
Great for church camps, bible study groups and just because, this tie-dye cross T-shirt is fun to wear all year long! Combine your favorite Tulip® One-Step Dye® colors for this super cool cross technique.
1. Wash shirt and leave damp. Cover work surface with plastic surface cover and lay shirt out flat on covered surface. Smooth out wrinkles.
2. Fold pattern paper in half lengthwise. It should be at least as tall as you want your cross to be. Draw a half cross along fold and cut out. It should form a complete cross when unfolded.
3. Fold shirt in half lengthwise. Lay folded cross pattern along center fold of shirt.
4. Use a washable marker to trace around pattern onto damp fabric.
5. Starting at one edge of fold, pleat fabric along marker line, pulling fabric so that the marker line forms a straight line across the tops of pleats when entire pattern has been pleated.
6. Secure a zip tie tightly along pleated marker line. Secure a second zip tie about an inch outside of the first one.
7. Mix dyes according to package instructions. Apply Brown dye to body of cross.
8. Apply Black dye to the space between the two zip ties to create the border of the cross.
9. Apply random small drips of Black to the Brown dyed area to accent.
10. Apply Turquoise dye to remainder of shirt. Turn shirt over and apply dye colors to backside to ensure saturation of colors.
11. Cover dyed shirt with plastic wrap or surface cover and allow to set over night or for time suggested in package instructions.
12. Remove zip ties and rinse shirt under running water to remove excess dye.
13. Wash and dry shirt according to fabric instructions.